How to Install new NBN connection FTTN
What is nbn FTTN?
Fibre to the Node (FTTN) is a way of delivering access to fast broadband by running fibre
optic cable to a neighbourhood node/cabinet and then utilising the existing copper network
to the end user premises. VDSL2 is the technology nbn is utilising to deliver broadband over
the copper network.
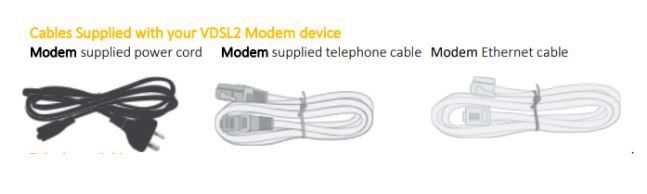
Check you have all equipment needed:-
To set up your FTTN connection, it’s essential you have all the equipment outlined over
this page.
A compatible VDSL2 gateway/modem device.
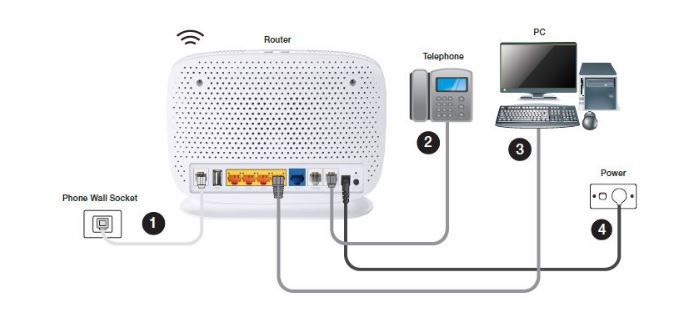
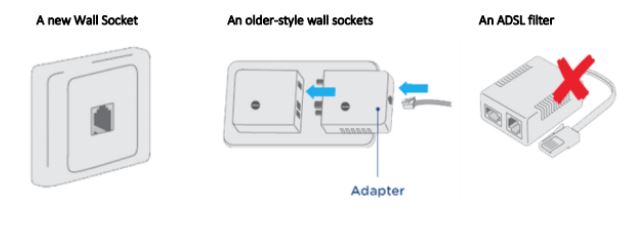
Find the right telephone wall socket
Your telephone wall socket is the first point where your FTTN|B connection enters your
home if you have transitioned an existing copper pair, so finding the right one is vital.
It could look like either of the illustrations below, and is most likely the socket that currently
connects to your phone or internet service.
Check CPE Modem configuration.
The CPE modem should have its configuration verified (including firmware version,
authentication settings, VLAG tagging, DSCP or p-bit marking by traffic type etc.1), and be
proven at an alternative location or a different CPE modem tested. It is recommended that a
registered CPE modem be used for full assurance support from nbn.
The configuration of the service should be checked in the customer network, including
addressing modes, speeds, authentication settings, VLAN tagging, traffic class addressing etc.
These settings need to be verified as actually implemented in the Customer Network.
FTTN with PPPoE configuration:-
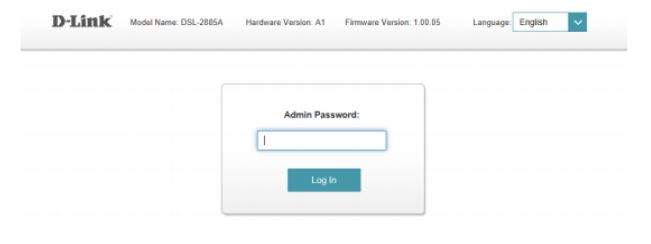
Step 1. Open your Internet browser e.g. Internet Explorer, Firefox, Chrome, Safari, etc. and enter the IP
address of your D-Link modem in the address bar: http://192.168.1.1.

Step 2. When prompted type in the Username and Password, enter the validation code displayed on your
page and then click on the “Log In” button.
If you have not changed the password for the modem administration, the factory settings are:
Password: admin
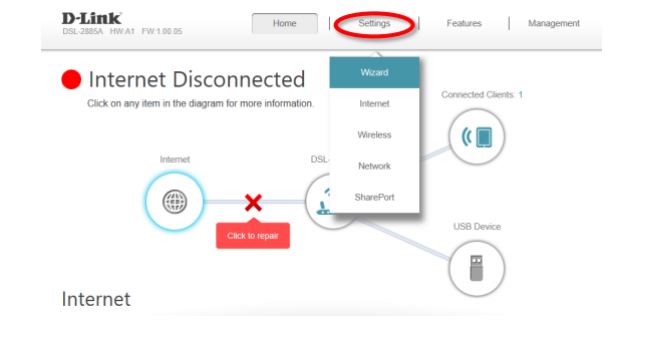
After logging in you will be presented with the modem’s Setup Wizard configuration page.
If the Setup Wizard doesn’t appear automatically, then you can initiate the Setup Wizard by clicking on
Settings > Wizard.
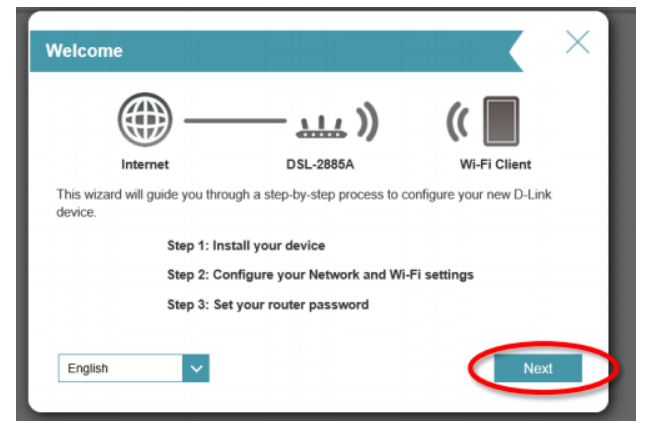
Step 3. Once the Setup Wizard configuration page is up, click Next and follow the Setup Wizard.
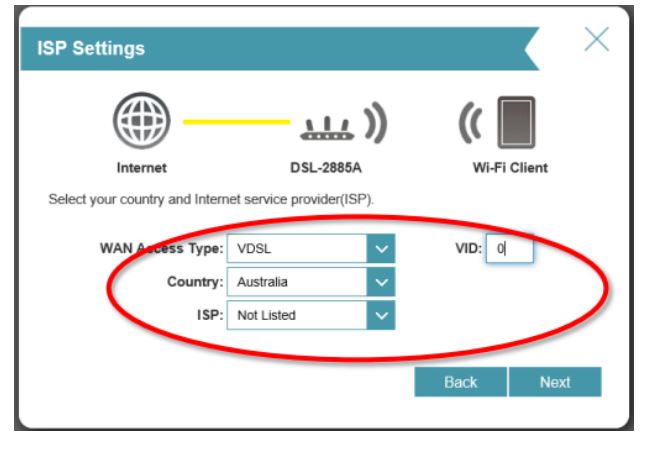
For VDSL connections select WAN Access Type as VDSL, Australia, followed by selecting ISP as (Not
Listed).
Set the VLAN ID (VID) as advised by your Internet Provider. Some providers require VLAN ID to be set
to specific value, otherwise please leave as zero.
Proceed by clicking Next.
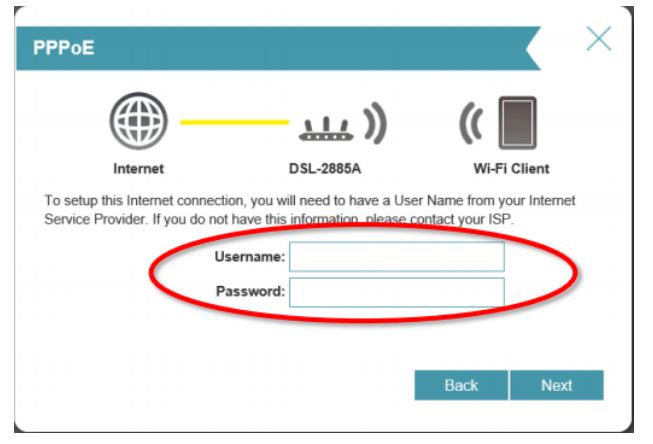
Step 4. Enter your full Username and Password as suggested by Internet Service Provider.
Username is normally will PPPoE username for Example: John@netcube.com.au and password: Po8LmNk1
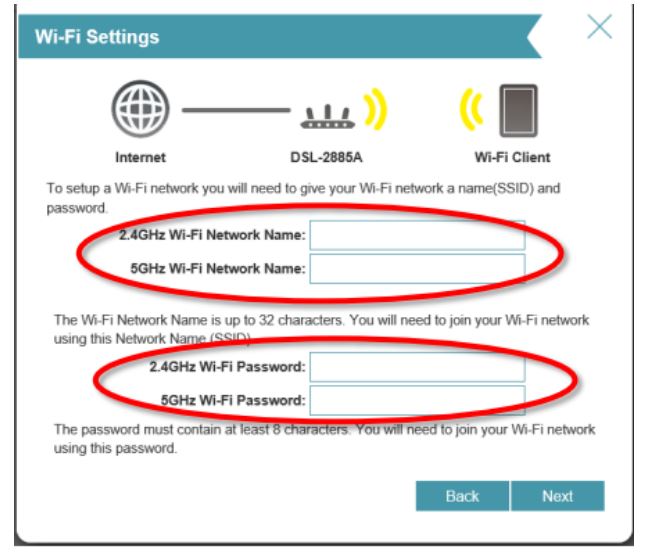
Step 5. Configure and setup your Wireless Network:
Give your Wireless Network a name for each 2.4 GHz and 5.0 GHz wireless networks and assign a secure
password.
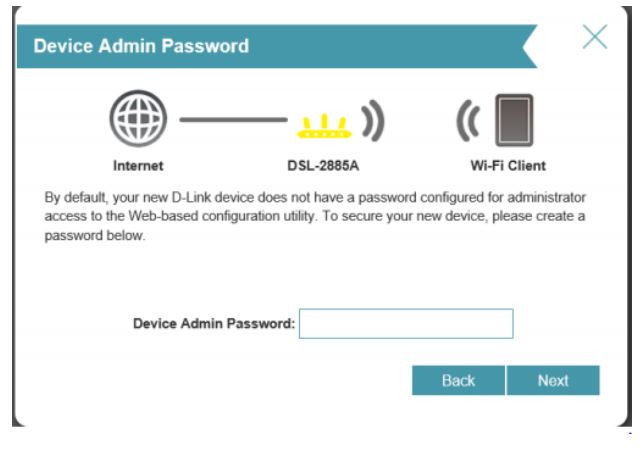
Step 6. Protect your modem router from unauthorized access by assigning a secure password.
It is recommended to change the default “admin” password to a secure password which needs to be a
minimum of 8 characters long.
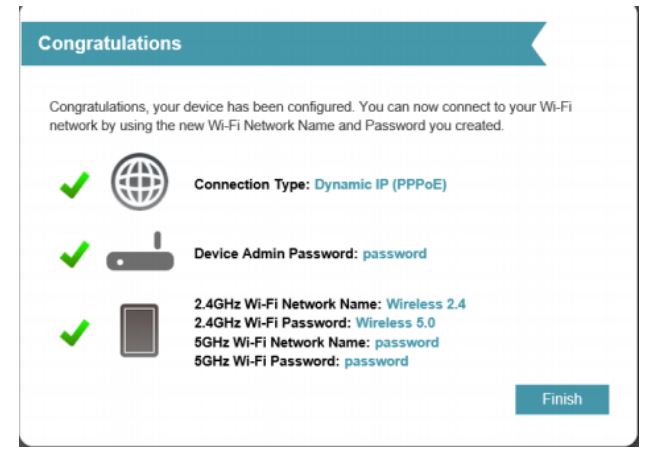
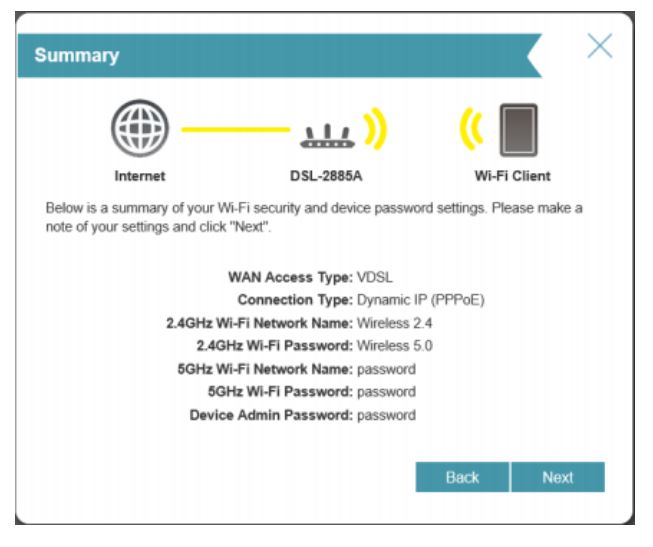
Step 7. A summary of the connection and password settings are shown on the next step.
Confirm and proceed by clicking Next.
Step 8. Congratulations – The setup is Complete – Click Finish